Monona’s
Earth Day Celebrations
April 20-26, 2024
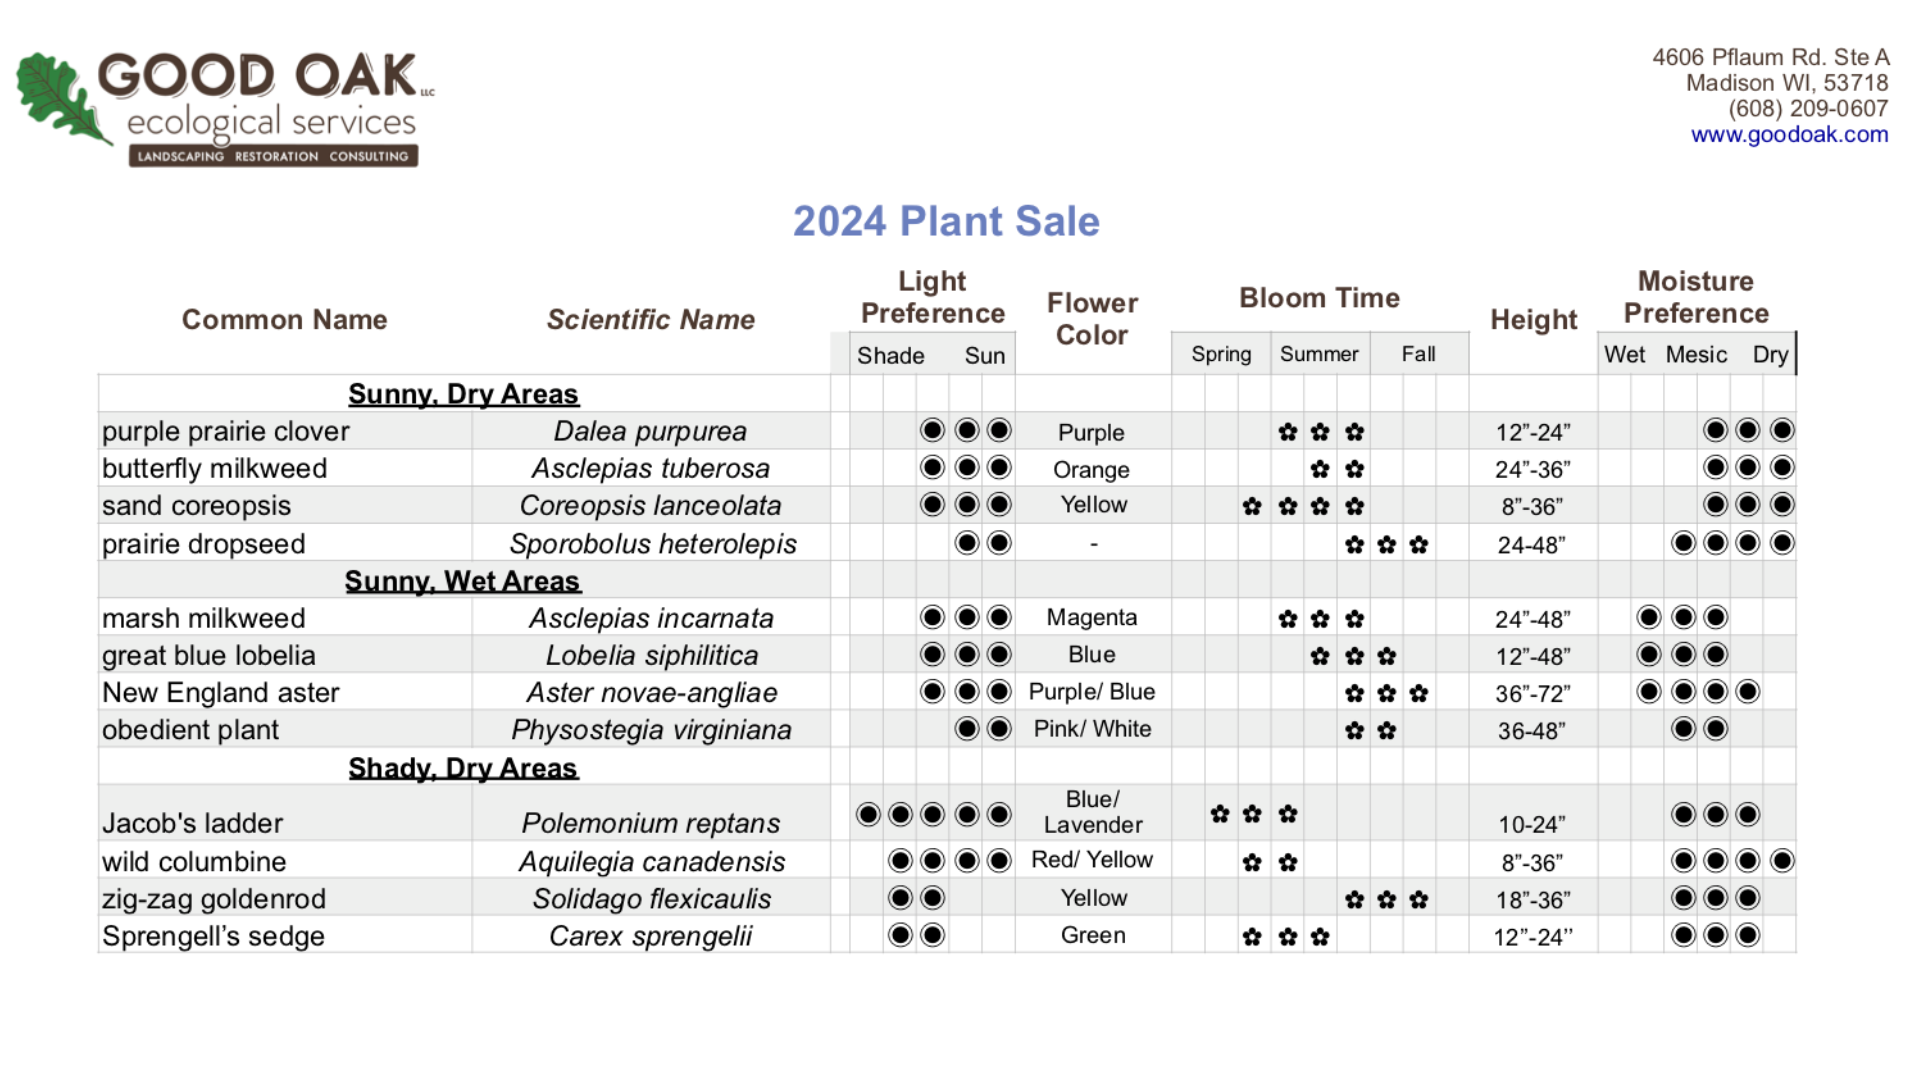
We’ve made it easy for you. Our order form is broken into sections for sun vs shade, and wet vs dry, with pictures of the plants in bloom. Pre-orders available online until April 17th. Some additional plants will be available for onsite purchases.
Residential orders: Plants arrive as 2×2 plugs, $5 a piece. Pick up will be at Aldo Leopold Nature Center on
April 20 from 9-1p,
April 21 from 10-2p, and
April 22 from 9-4p.
Business orders: plants are free of charge, with planting assistance, native plant garden signage, and social media recognition for your efforts. Planting assistance at your location will be available on April 26 from 2-4p.
Read on for additional information to consider when planting natives.
Native Plant Options
- Consider specific locations you’d like to put the plants, and determine if they are sun or shade.
- Height is an important factor too; most of these can get 2-3 feet tall.
- They’ll need a lot of watering the first year, but will be able tolerate dryer conditions once they’re established. Year two they’ll look ok, but will mostly be developing they’re root system. Year three you’ll really see them flourish and expand.
Native Plant Preparations and Care
How to Plant Native Perennials, by Frank Hassler, Ecologist and CEO of Good Oak Ecological Services
Definitions
Before we get started, lets get a bit of the terminology involved with native plants clear. All plants can be divided into woody plants and herbaceous plants. Obviously, woody plants are those made of wood, including trees shrubs and some vines. Herbaceous plants are those which only have soft tissues. They have to sprout from seeds or roots every spring.
Annual plants sprout from seed, grow, fower, set seed and die all within a year. The next year the next generation of plants need to start over from seed again. Most native annuals are not very showy and some are even considered weedy. In many cases they will join a native planting on their own so there is no need to plant them. Partridge pea and hairy wild petunia are two native annuals that we use in native landscaping and restoration because they have showy fowers that attract bees and butterfies and bloom in the frst year of a seeded prairie or planted bed.
Most of our native plants are perennials, meaning that they will live for several years with the roots sending up new leaves and fowers each spring. Some of these plants are very long lived. For example, compass plant is known to live for over 20 years, and prairie dropseed grass may live for over a century. So when you put these plants in a location and conditions are right for them, you can expect them to be there for a very long time. These species may also take a few years to fower, because the plant is focusing on getting those long lived roots established. Others, like black-eyed susan are short lived. They will often fower in the frst year and will re-seed themselves in a planting. Many of our native perennials fall somewhere within these two extremes.
You can divide native herbaceous plants into two basic types graminoids and forbs. Graminoids include grasses, sedges and rushes. At a glance, all of these types of plants look similar since they have long skinny leaves. Rushes are typically confned to wetland areas with just a few species specializing in upland habitats. Sedges are very common in wetlands prairies and woodlands, but are often overlooked because they look, to the uneducated eye, very similar to grasses. Sedges have stems which are triangular in cross-section as opposed to the round cross-section of grasses. There are many unique characteristics to their fower and fruit structure as well. Because many sedges are short, grow in distinctive clumps and have graceful leaf structures they are an excellent addition to a native planting. Despite the fact that grasses, sedges and rushes are distinctively types of plants they are often clumped together as graminoids since they look similar. Since “graminoids” is a bit of a mouthful, they are sometimes just called “grasses” collectively, even though sedges and rushes are not grasses at all.
Forbs is another amalgamated groups of plants which basically consists of anything which is not a grass, sedge or rush. These are your broadleaf plants with showy fowers that are typically referred to as “wildfowers”. Plants ranging from irises to sunfowers are all considered forbs. We often use the terms “native perennials” or just “perennials” to describe those native broadleaf plants that we include in a planting since almost every species that we will plant will be a perennial.
Planning
When to Plant?
The frst thing you should consider when planning your planting is what you will need to do to prepare the site, and how long this will take.
Our native plants are fairly hardy and can be successfully planted throughout the growing season as long as the care recommendations in this guide are followed. Even spring ephemerals can be planted as root stock through most of the year, but it can be more fun when they are blooming in the spring. Most people prefer to plant in the spring or in the fall. If you are planting in the months of June, July and August be sure to water them regularly and monitor the plants for signs of drought stress such as wilting. Also when planting during hot weather be sure not to leave pots with plants in them in the sun for extended periods of time as the heat can kill the plants roots.
Spring planting should be done after the date of the average last frost for the year. In Madison this is around May 5th. In Chicagoland its closer to April 20th, and in central Illinois its closer to April 13th. Though most of these plants are frost tolerant, they can be vulnerable as young seedlings. For fall plantings, the plants should be in the ground at least a month before the frst frost, so that they have plenty of time to put some roots down before going dormant for the season. Here in Madison, September is a great month to plant herbaceous plants.
Grass to Forb Ratio
Native grasses and sedges are often undervalued in native plantings since they don’t produce showy fowers like forbs. However, grasses and sedges are a critical structural component of our natural communities, especially prairies. Their fbrous roots compete with the forbs for moisture and nutrients keeping the size and spread of the broadleaf plants in check. A lack of suffcient grasses in a planting is a common cause of the tall, fopping plants often seen in poorly planned prairie plantings. Furthermore, grasses and sedges provide food and habitat for many animals. Grasses also provide excellent winter interest.
Therefore, we recommend that for prairies about 40% of the plants installed be grasses or sedges, for savannas about 30% of the plants should be grasses or sedges and for woodland 20% of the plants should be grasses or sedges. This often results in there being numerous individuals of just a few grass species in a planting. This is desirable, because it replicates the same situation in natural communities. In the densest shade areas grasses will not grow, so include just a few sedges in these areas instead.
How Many Plants?
In order to have a stable natural community I recommend that you plant as many species as is practical. For most residential plantings this means 15 to 40 species of plants. This diversity will have a number of benefts. First, it is more likely that several species will be blooming, providing color and interest, at any given time during the growing season. Second, a diverse plant mix provides better habitat for a wide variety of benefcial insects, birds and other wildlife. Lastly, if by chance a few species don’t thrive at this site there are plenty of others there to take their place.
In order to reduce the chance that a species will fail to reproduce in your plantings, I recommend that you plant a minimum of eight individuals of each species so that they can cross-pollinate one another. In order to produce a more dramatic visual impact when the plants are in bloom, I recommend planting even more individuals per species, and grouping them in several clusters of 3-12 plants each.
Plan on planting at least one plug per square foot. This makes it simple to fgure out how many plants you will need for a project, however if you can afford it, consider planting another 20% or 30% more plants as a more dense planting will fll in more quickly. Be sure to account for trees, rocks, shrubs and other obstacles when calculating the area. Once you actually begin planting you should consider the fnal size of the plant to determine appropriate spacing between individuals. For example, large plants like white wild indigo and prairie dock will need more than a foot between plants, whereas prairie smoke and prairie phlox can, and should be planted less than one foot off-center. If given a choice, always round up the the number of plants to make the planting more dense as these plantings will look better sooner. More widely spaced plantings will have plants that get large, foppy and “wild” looking for the frst several years until the plants spread together and compete for resources, which keeps them shorter and tidier looking. Also, higher density plantings will leave less space and resources for weeds to get established.
Now, if you do some simple math 15-40 species multiplied by at least 8 individuals adds up to a lot of plants quickly. Also take into account that close to half of these plants will be from just a few species of grasses and sedges. Once you measure your planting area to determine how many plants you need, it quickly becomes clear that some compromises must be made when determining how many species and individuals of each species you should include in your native planting.
There are no hard-and-fast rules as to how you should balance all these factors, but there are a few aesthetic considerations that might help. For example, larger plants have a greater visual impact than smaller plants, so you should consider reducing the number of individuals of larger species and
increase the number of individuals for smaller species. So you might have four prairie dock and twelve prairie phlox instead of eight of each. Also remember that you want to have at least a few species blooming at a time through the entire growing season. So if you have a lot of fall blooming asters and goldenrods on your list of possibilities, then you might strike a few in favor of more summer blooming species.
What Size Plant Should You Purchase?
Even though smaller plants may take longer to grow to blooming size, we prefer to use plants in 2.5” or 1 quart containers for our plantings. First, these plants cost less. Second, they tend to have an easier time getting established and will be healthier and more showy then those in larger containers. This is especially true for prairie species that have massive root systems which establish early in the plants life and grow as much as 15′ deep into the soil. Even modest looking plants in small containers may already be pot-bound. When the right plants are chosen for the right site, it will typically take 2 to 3 years before your plants are mature, fowering and flling up space in the planting bed. Large plants just don’t speed the process up that much.
Site Preparation
Before you can begin to install a bed of native plants you will often have to remove lawn in the area you select for planting. There are several methods to do this. One method is using a sod stripper to remove the grass, weeds, and the top few inches of soil. This method is effective at removing grass and potential weed seeds in the soil. It is diffcult work when done with a manual sod stripper or fat bladed shovel (also known as a spade) so this method is best only when installing very small plantings of 200 square feet or less. A gas powered sod stripper is a very effective way to clear large areas of sod but take into account the cost of rental, and the fact that there is still a lot of labor needed to remove the sod from the site. We usually carefully pile strips of sod on a tarp on the curb and post it on Craigs List as free for the taking. If you do a good job of keeping the sod strips intact other people will do the work of disposing of the sod for you.
Another option is to herbicide the area which is to be planted with a 2.0% solution of glyphosate herbicide such as RoundUp®. This will kill the grass, but the treatment will be need to be repeated again in 2-6 weeks as new grass and weed seedlings sprout in response to the newly opened growing space. After this second herbicide treatment you should wait at least two weeks before entering the area to work in order to give the glyphosate time to break down and dissipate. Once this time has passed you can begin your installation.
Another technique we commonly use is smothering. The technique is simple. First mow the grass in this area as low as possible. Then lay down 6-10 layers of newspaper, or a single layer of cardboard over the lawn you wish to kill and replace with a planting bed. If you use newspaper you will need to wet it down in order to prevent it from blowing away, cardboard should also be moistened to make it more pliable. Lastly, cover the area with about 4 inches of good quality mulch. Leave this smothering layer sit for 3 to 6 weeks. If you want to you can smother during one growing season, leave the area mulched over winter and then plant the next spring. You may then plant right through the mulch and smothering layer.
Smothering works best when it is done in early spring for late spring or early summer plantings. It can also be done in the summer for fall plantings. Smothering is not as effective when done during the fall since plants are going dormant at this time anyway. The paper smothering layer will break down during the winter and the lawn and/or weeds will be able to grow through the mulch in the spring.
Replacing A Weedy Perennial Bed
Another common situation is when home owners wish to replace a planting bed in which weedy perennials are well established. Common problem plants include aggressive ornamental like orange daylily, goutweed (bishops weed), lily-of-the-valley, periwinkle (vinca), English ivy, and any number of perennial weeds like dandelions, thistle and creeping charlie. These plants are much more diffcult to manage than Kentucky bluegrass due to their deep roots and tenacity.
If you wish to avoid using herbicides, then your only option is digging up the bed, grubbing out and removing the roots of all of the weeds. You will need to repeat this process at least two to three times in order to insure that most of these aggressive weeds are removed. Even then, you will likely fnd a few here or there after you have planted your native plants that you will have to remove. This is a lot of hard work, so take this into account when you are planning your project.
Using herbicides to prepare your planting bed can greatly reduce the amount of labor involved, and if done carefully, will cause little environmental harm. The frst, and most important rule to using herbicides safely is to always read the product label for the herbicide carefully, use them only as directed and follow safety recommendations listed there. Spray only enough chemical to cover the leaf surface you are spraying, and not so much that it drips off the target plant onto surrounding vegetation. Always wear protective clothing such as disposable nitrile gloves, long sleeves, pants, and non-permeable shoes.
Most of the perennial weeds listed above are somewhat resistant to the effects of glyphosate, the active ingredient in herbicides such as Round-Up®. As such, we prefer to use a 2.5-4% solution of this chemical for use against these aggressive perennials for better control. Or, plan on spraying the area repeatedly, typically 2-3 applications are needed to not only kill the initial weeds, but also any new weed seedlings that will sprout up to take advantage of the newly available growing space. Once the perennial weeds have been killed off, you can also use a hoe or a rake to break up the soil surface and kill the weed seedlings that are becoming established.
Installation
When choosing how to arrange plants, I usually spread the grasses and sedges diffusely throughout the planting and clump the fowering species in groups of three to ten plants. This way the grasses forms the matrix of the planting as they do for plant communities in the wild (though they can be massed for effect if you wish). By clumping the fowers, they create a showier display and have more aesthetic impact. This works best for fowers with a vertical structure such as liatris, solomon’s seal and tall bellfower, that already “stick out” of the planting boldly. For other species with smaller or more diffuse fowers such as wild leak, Jack-in-the-pulpit and anemones, you might spread these plants out, so that you have to visually explore the entire planting in order to search out each fower.
Often we choose to plant shorter species near the edges of the planting so they are more visible around their taller neighbors. This isn’t always necessary for prairie plantings since the shorter species tend to bloom early in the year while the rest of the vegetation is fairly short and the plants (with the fowers on top) tend to get progressively taller through summer and into fall. Another thing to consider for the edge of a planting is an elegant clump forming plant, we like grasses like prairie dropseed or sedges like Bicknell’s sedge or Pensylvannia sege. These fne leaved graminoids show the best contrast when they are put on edges abutting stone or concrete, the effect is not as pronounced when they boarder and edge abutting lawn.
Consider also the texture and color of the foliage of the plants you are planting. It can be attractive to contrast lighter foliage such as spiderwort, rattlesnake master or lead plant with darker foliage such as solomon’s seal, New Jersey Tea or sedges. Also broad leaves such as those of mayapple, geranium or sunfowers can be planted together for effect, or planted alongside fne-leaved plants such as jacob’s ladder, asters, or mountain mint for contrast.
Plant Installation
For each plant, dig a hole just a little larger than the plug you are planting. A power drill with an auger bit or a sharpened garden trowel are the best methods for digging holes for 2.5” plugs. Our favorite tool is called a “hori hori”, also known as a soil knife. This tool, Japanese in origin, is very effective at digging for planting and also at cutting and digging out weeds. If you are dealing with larger plants, for example quart sized, the auger bit is still a good way to get the hole started, but the work will need to be fnished by hand with the trowel or hori hori.
When you remove the pot from the plant, be sure that the plants are not “pot bound”. Pot bound means that the roots are not twisted around the inside of the pot. Usually you will see the roots on the edge of the plug’s soil mass and clumped at the bottom of the pot, even sticking out of the bottom. If this is the case you should cut off the bottom 1⁄4 of the roots in order to stimulate new root growth. Also, use a knife or sharp digging tools to slice any of the roots that are wrapped around the root plug. Gently tearing these roots of fner rooted plant will also work. You don’t want to “destroy” the roots of the plants you are installing, but some aggressive treatment is required. The idea is that new growth can begin at the points the roots were cut and spread out into the surrounding soil.
Often plants in larger containers such as quarts will have a lot of loose potting soil around
them. With these plants it is best to leave as much of that potting soil in the pot as possible. Carefully remove the plant from the pot keeping only the potting mix that is attached to the roots directly with the plant. This will also make planting easier since the hole needs to be smaller.
When planting, be sure the top of the soil level of the plug is level with the actual ground level. Once the plant is in the ground, back-fll the hole with some of the left-over soil from when you dug the hole. These plants need to get used to the soil they will be growing in, not the planting medium from the pot. Dispose of the excess potting soil. Typically there won’t be much so you can just spread it broadly over the planting area or save it for other projects.
Once installation is complete the plants must be watered heavily. I usually tell people that they should water them until they are quite sure they have over-watered them, and then you are probably watering them just enough. You will need to repeat this watering every-other day it does not rain for at least the frst two weeks after the installation.
Mulching
Two to three inches of mulch is usually suffcient, and we prefer leaf mulch or twice shredded hardwood mulch for use in native plantings. These are typically clean materials which break down into organic matter and enrich the soil fairly quickly. Never choose cedar mulch since they cut down these wonderful trees just to turn them into mulch! Also, be weary of the free mulch offered by many municipalities. This mulch is made from waste material, including weeds and diseased trees. Quality may be different in different towns, but here in Madison we cannot recommend using the free mulch provided by the city. The money spent purchasing mulch is a well spent investment to avoid future weed and plant disease problems.
After the initial installation, it is best to limit your mulch use. Mulch is effective at reducing the amount of weeds that can get established in the planting, by preventing weed seeds that are blown in from coming in contact with soil and germinating. However, it will have the same effect on seeds from native plants which are needed for the plants to reproduce and fll in growing space. Also, mulch can make it diffcult for some native plants to spread by underground rhizomes, so the plants you already have may have a hard time flling in the planting. After the initial mulching, we recommend only limited use of leaf mulch to keep it looking tidy for a year or two until the plants fll in the planting areas more completely. If you are feel you must mulch the planting for aesthetic reasons, you can use hardwood mulch or bark mulch around the edges of the planting only.
Maintenance
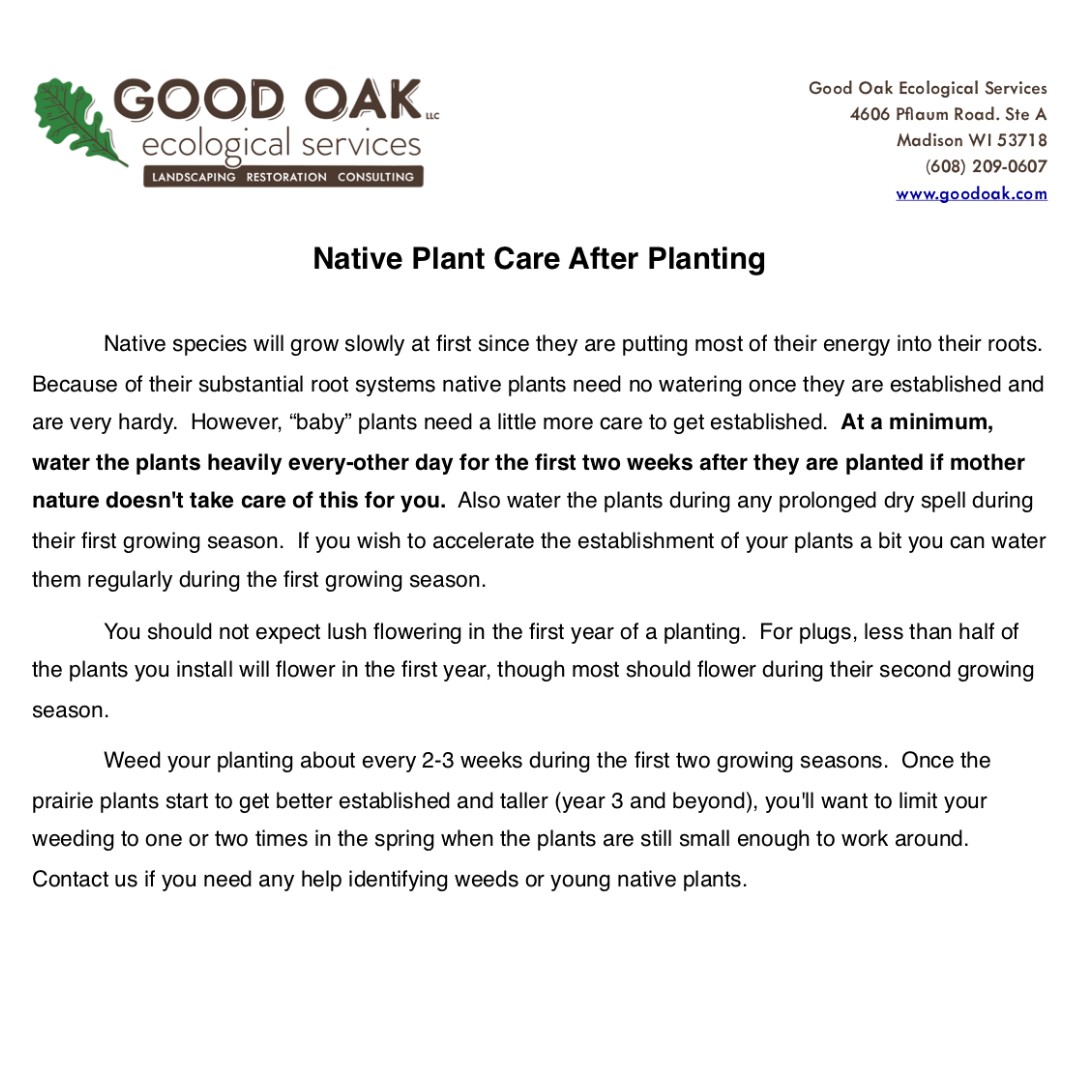
Native species will grow slowly at frst since they are putting most of their energy into their roots. Because of their substantial root systems native plants need no watering once they are established and are very hardy. However, “baby” plants need a little more care to get established. At a minimum, water the plants heavily every-other day for the frst two weeks after they are planted if mother nature doesn’t take care of this for you. Also water the plants during any prolonged dry spell during their frst growing season. If you wish to accelerate the establishment of your plants a bit you can water them regularly during the frst growing season, this can be especially helpful for plantings started by seed.
You should not expect lush fowering in the frst year of a planting. For plugs, less than half of the plants you install will fower in the frst year, though most should fower during their second growing season. For seeded plantings there will be few to no fowers in the frst year, these plants will not usually reach their full glory until the fourth growing season.
There is always a little weeding required when establishing new plants. Fast growing weeds that might be a problem include canada thistle, reed canary grass and others. However, most of the weeds you will fnd in these plantings are common lawn weeds like dandelions, plantain, clover, wood sorrel, Kentucky bluegrass and crab grass, which you should be able to recognize and remove. Grasses can be a bit tricky, it can be hard to tell crab grass or kentucky blue grass from the native plants. Contact us if you need any help identifying weeds or young native plants.
Weed your planting about every 2-3 weeks during the frst two growing seasons. Once the prairie plants start to get better established and taller (year 3 and beyond), you’ll want to limit your weeding to one or two times in the spring when the plants are still small enough to work around.
Support Local
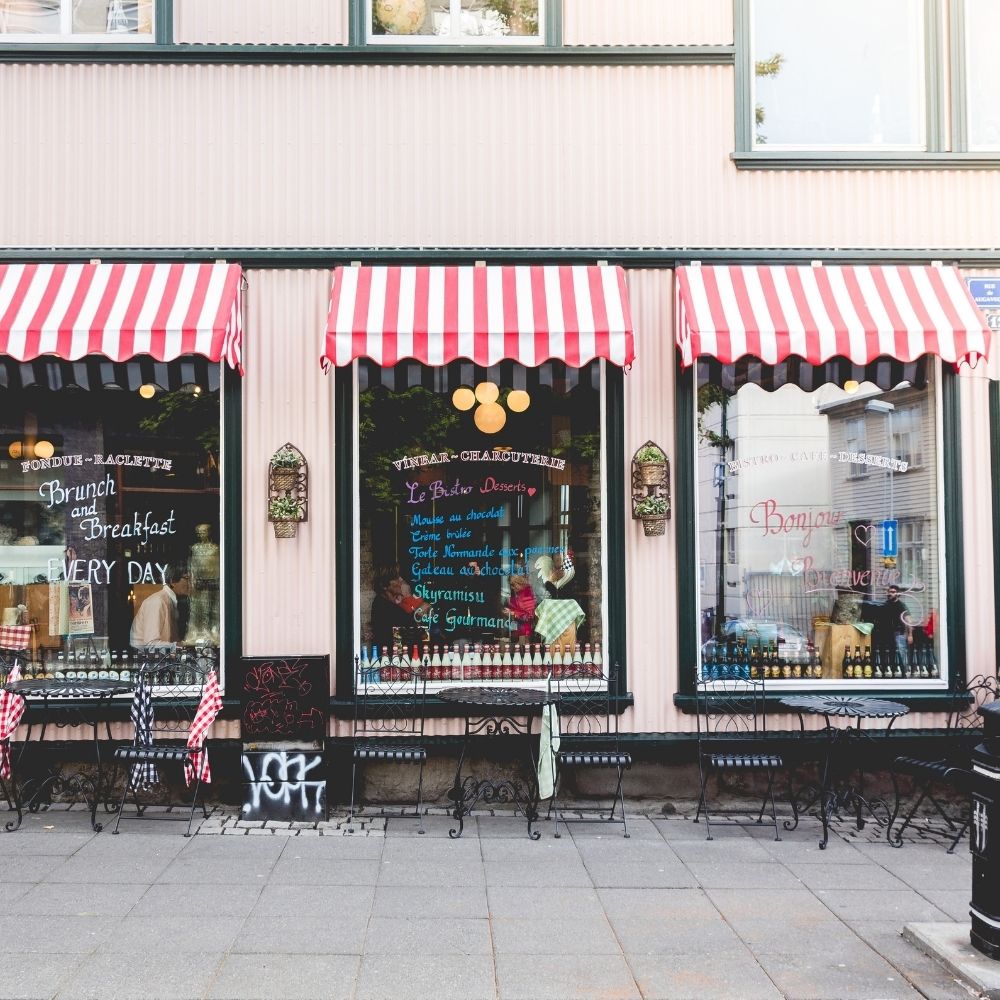
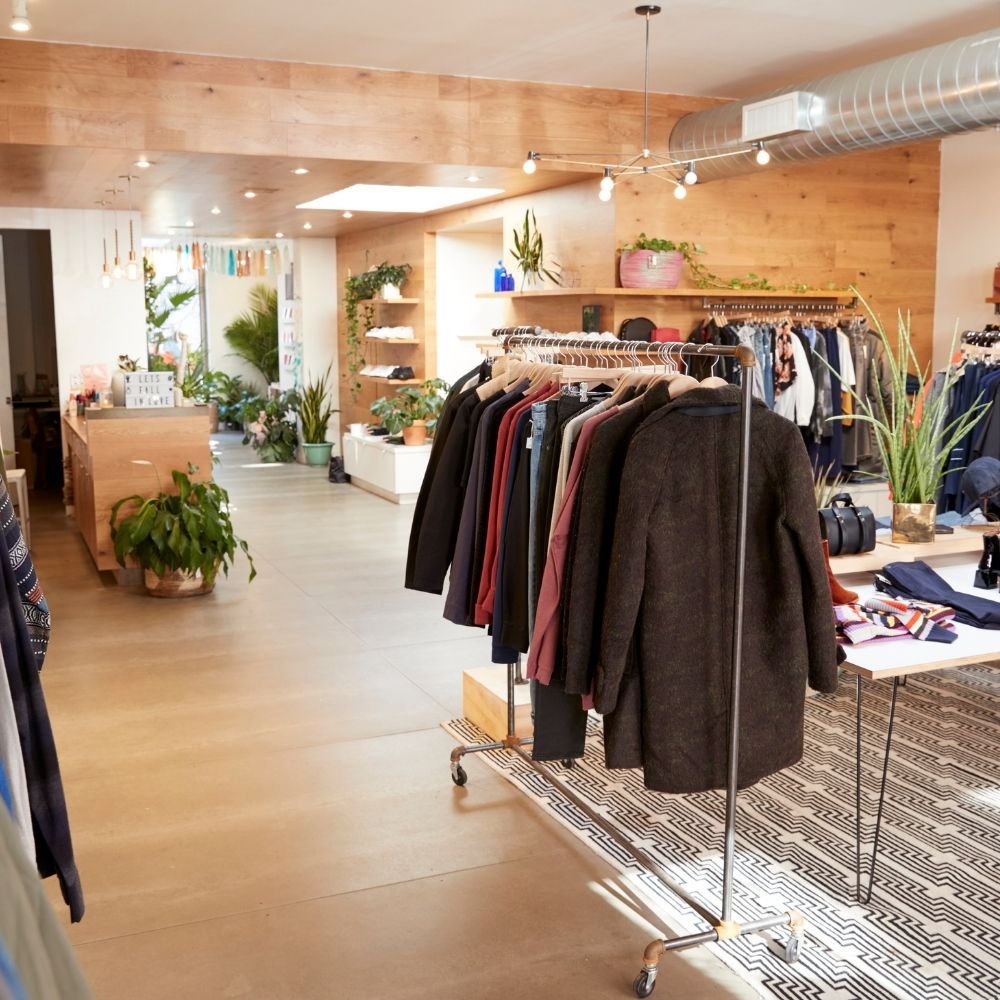


This is the official visitor site for Monona, Wisconsin. Learn about the town's history, find places to stay, things to do, restaurants, shops, and more.
Photos by Bruce Fritz
Sponsored by:

Contact
Monona East Side Business Alliance: PO Box 6264, Monona, WI 53716
(608) 416-1610


